A slightly belated Happy New Year to all! Hopefully it will be a good one.
For the start of the 2012 I thought I needed to give myself a bit of a challenge, a crafty project I've fancied trying for a while:
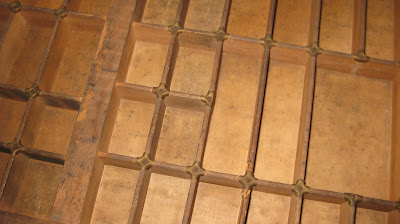
It's a real vintage printers tray, purchased off Ebay and it arrived yesterday - I was a little overexcited :0)
It needs a bit of cleaning and I'm debating over removing some of the dividers to create larger sections, but it has some lovely brass details which will look gorgeous polished up.
I might have mentioned in a previous post that hubby and I are hopefully buying a house, so I guess I got the printers tray with the idea of it being a nice interesting bit of decor for the new house. However, things with the house aren't progressing quite as well as we hoped, so like the weather, I'm feeling a bit bleak about it today (seriously spooky stormy light outside at the moment!). Going to keep my fingers tightly crossed because I really don't want to have to start the house hunt all over again.
Anyway, at least I've got my crafty project to keep my mind off the house for now. The only question is: 95 sections - where the heck do I start?
xx
Showing posts with label shabby chic. Show all posts
Showing posts with label shabby chic. Show all posts
Thursday, 5 January 2012
Tuesday, 29 November 2011
Mirror Number 3
I'm not managing to find much time for craft at the moment, and when I do find a spare moment it has to be used for christmas stuff.
I did this mirror as a christmas present:
The mirror frame was coloured with aged mahogany distress inks, then, when it was fully dry, I stamped and embossed the Tim Holtz Papillon background stamp. This acted as a resist for white paint (PaperArtsy Fresco Finish). The colour of the ink and the paint blended to give a lovely pinky colour (the first picture shows the colour most accurately).
I cut the flowers out of grungepaper with the Tim Holtz Tattered Florals Die and coloured them with the same ink and paint as the frame (actually I used a bit of crackle glaze between the ink and the paint to give it a bit more of a rustic look).
A bit of lace and a few other little bits of embellishment and it was done.
Sarah
xx
Sarah
xx
Wednesday, 2 November 2011
Mirror number 2
A couple of posts ago I showed an ikea mirror I'd decorated on a travel theme; today I've got another mirror to show you. It's in a very different style to the last one - a bit of a shabby chic look.
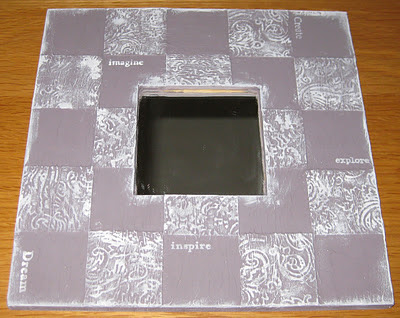
I embossed some cardstock with embossing folders from the Tim Holtz damask and regal flourishes set. I cut into squares and glued to the mirror in a chequerboard pattern.
I covered the whole frame with a thin layer of tissue glued down with a watered down mix of matt multi-medium, then painted it with Paperartsy fresco finish paint in London Night.
Once that was dry, I dabbed white paint over the raised areas and edges. Finally, I stamped a few words in white paint.
My husband loves the last mirror I did, but isn't very keen on this one at all. Hopefully it's just a matter of taste - probably a bit too girly :0). I like it, but I'll be interested in what everyone else thinks.
Sarah
xx
Sarah
xx
Wednesday, 3 August 2011
Shabby chic butterfly box
Just a quick post to show you the box I've decorated for the Slaley Show (see earlier post).
It started off as a wooden box that had chocolate coated gingers in. I painted it with Fresco Finish paints in baltic blue outside and in, then used a layer of crackle glaze on the outside and painted over with snowflake.
The butterfly stamp was one of the Craft Stamper magazine freebies and the other stamped elements are from a magnetic set from Making Memories. All stamped in black archival ink.
The bookplate is a Tim Holtz ideology one smudged with some more baltic blue paint. The butterfly image in the centre is from the Tim Holtz Papillon stamp set - I happened to have it stamped on acetate left over from a previous piece. I covered it with diamond glaze for a glassy effect.
I quite like the finished box, although there are definitely things I would change if I was doing it over, including stamping the butterflies inside the box in white, and generally making a neater job of the painting. Also I think I would have tried to use the papillon stamps for all the butterflies - it's just a bit fiddly to ink up a single butterfly from that set.
That all for now. Thanks for reading :0)
Sarah
xx
Subscribe to:
Posts (Atom)


